Your First Interactive Session
This guide will walk you through your first test call to help you familiarize yourself with Spinf's powerful features.
Purpose of Your First Test Call
Your initial test with Spinf serves several important purposes:
To familiarize you with the Spinf interface and workflow
To demonstrate how Spinf captures and processes real-time conversations
To showcase Spinf's AI-powered assistance during calls
To illustrate how Spinf can summarize calls and provide post-call insights
By following this guide, you'll gain hands-on experience with Spinf's key features and understand how it can revolutionize your customer interactions.
Step-by-Step Guide
1. Logging In
Open your web browser and navigate to the Spinf webapp.
Log in using your provided credentials.
Note: Upon logging in, the Spinf Chrome Extension will also be authenticated automatically.
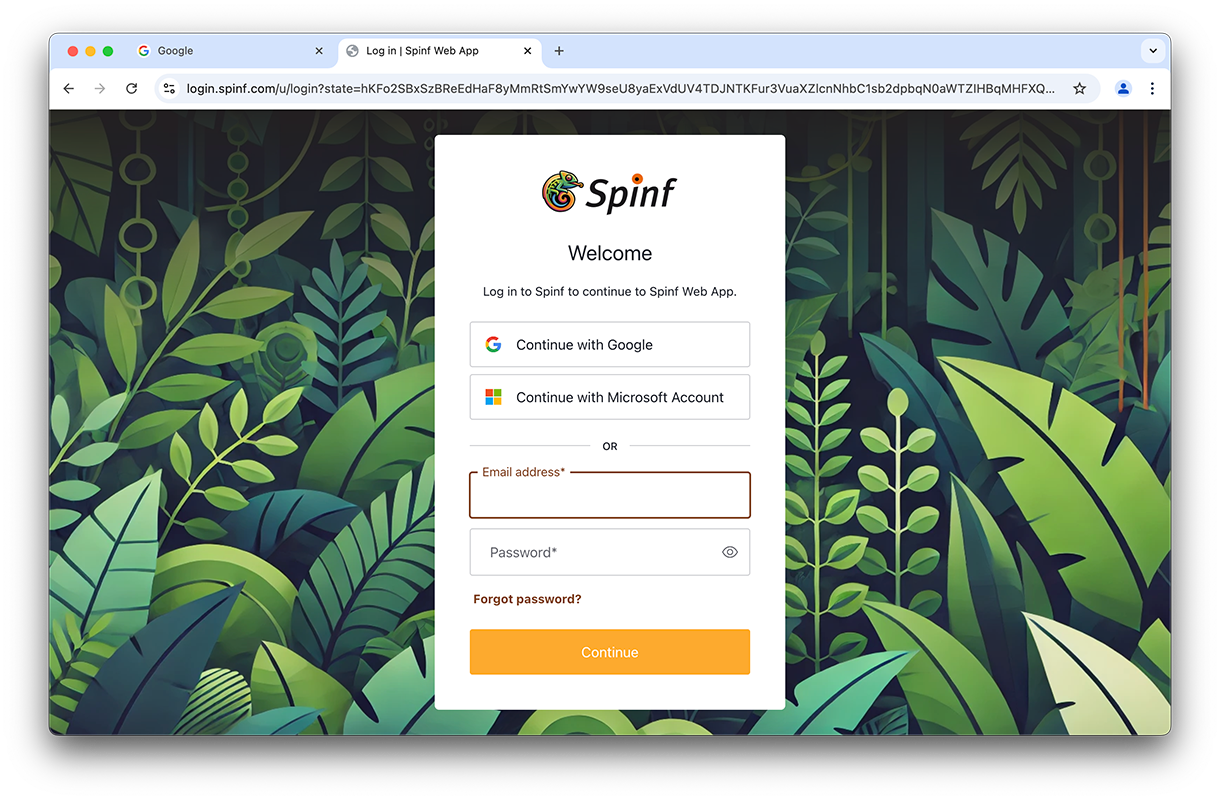
Login from the Spinf Web App at https://app.spinf.com
2. Importing Content to Your Knowledge Base
Visit a webpage containing relevant information you want to add to your knowledge base.
Click on the Spinf Chrome Extension icon to open the pop-up menu.
In the pop-up, click the "Import Content" button.
Wait a few seconds for the content to be ingested. You'll see the token count bar increase, indicating successful import.
Notice that the previously "Untitled Space" is now automatically renamed based on the main topic/product of the imported content.
Repeat this process to import additional content as needed (e.g., web pages, wikis, CRM info, PDFs).
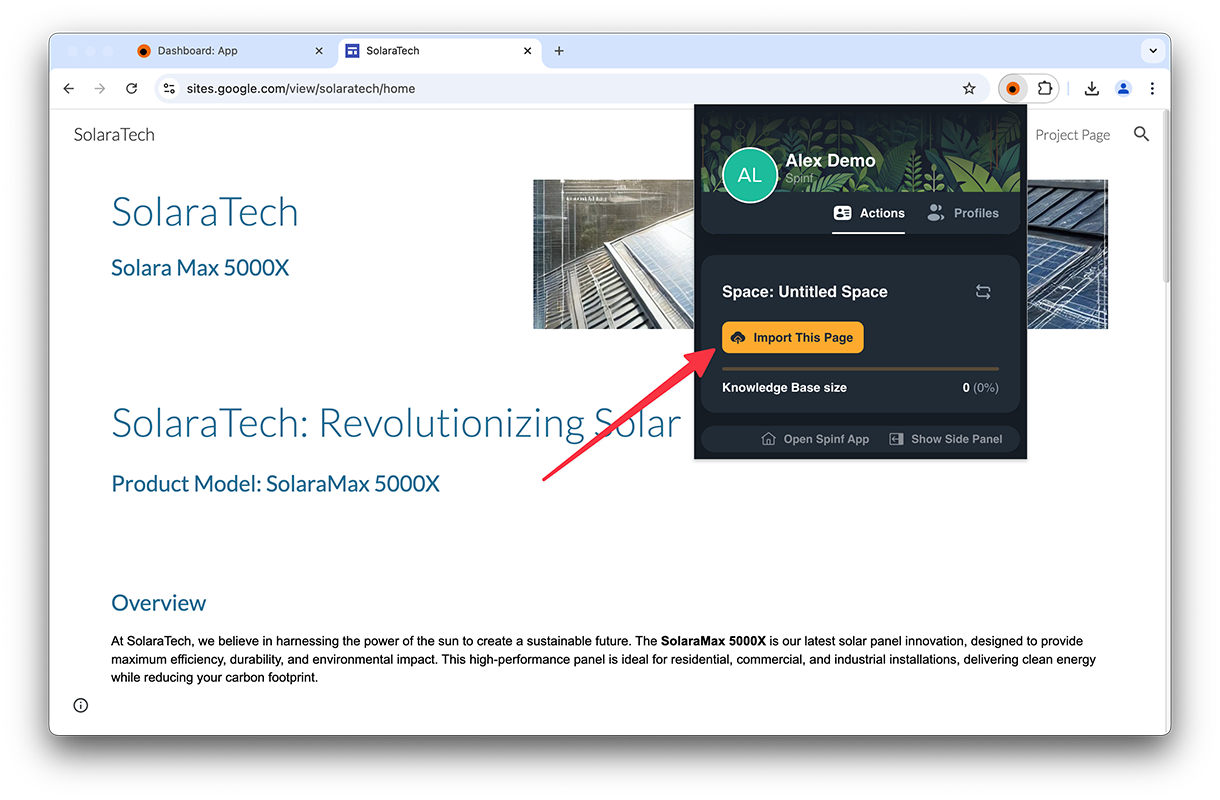
Import any page from the Pop-Up menu
3. Preparing for Your Test Call
Initiate a call as you normally would (e.g., using Google Hangout or your preferred softphone).
Click on the Spinf Chrome Extension icon to open the pop-up menu.
Click the "Open Side Panel" button to launch the Extension Side Panel.
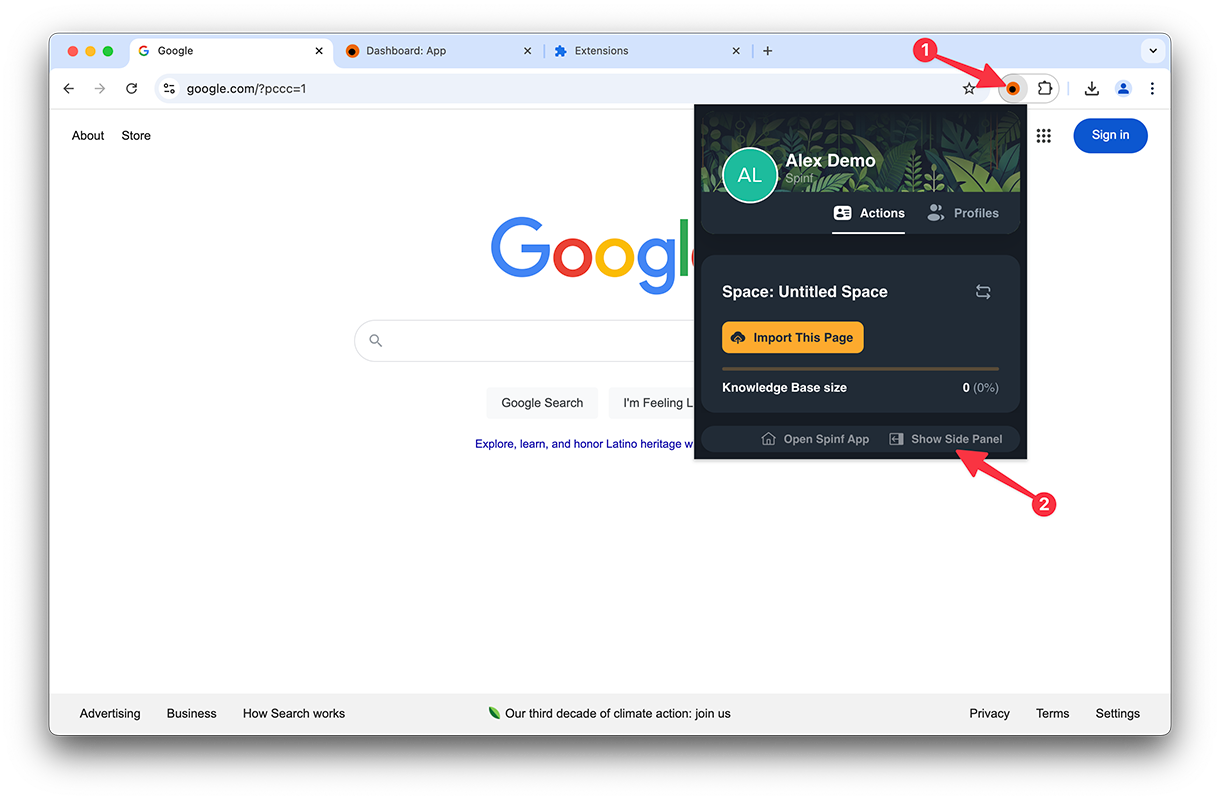
Use Pop-Up menu to open Side Panel
4. Starting a Real-Time Session
In the Extension Side Panel, click the "Start" button to begin a real-time session.
You'll be prompted to allow Spinf to capture your microphone audio and share the meeting or other audio source tab. Confirm these permissions.
Once the session starts, you'll see audio level indicators in the side panel, confirming that Spinf is receiving the audio signal.
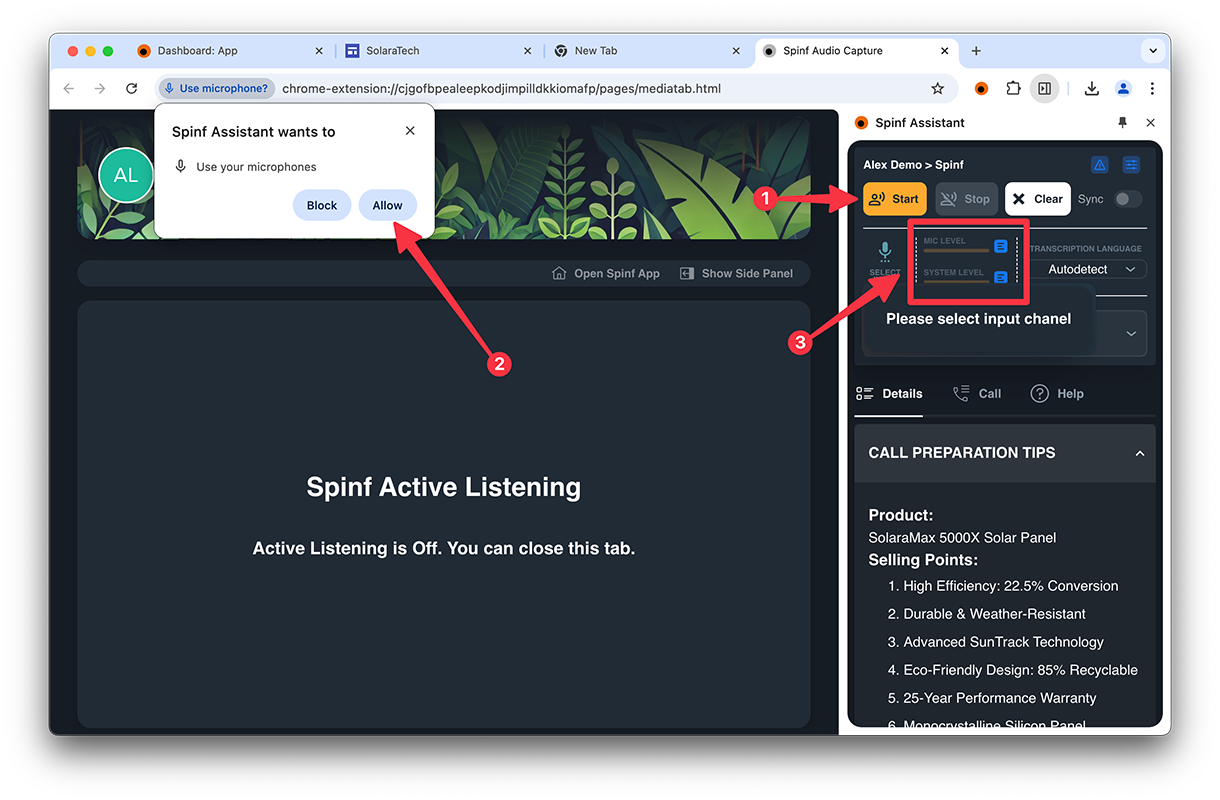
Start Session. Allow Mic access. Verify Levels.
5. Exploring the Side Panel
The Side Panel features three tabs: Details, Call, and Help.
Details Tab: This tab is for pre- and post-call analysis, including call summaries.
Call Tab: Here, you'll see the real-time speech-to-text transcription of your conversation.
Help Tab: This tab displays assistance and automation widgets for use during the call.
6. Using AI Assistance During the Call
Navigate to the Help tab in the Side Panel.
Locate the "Last Question" widget.
At any point during your call, click on this widget to have Spinf analyze the conversation, identify the most recent question, and suggest the most fitting answer based on your knowledge base.
If you want Spinf to use your imported knowledge base for answering, click the "Use KB" button.
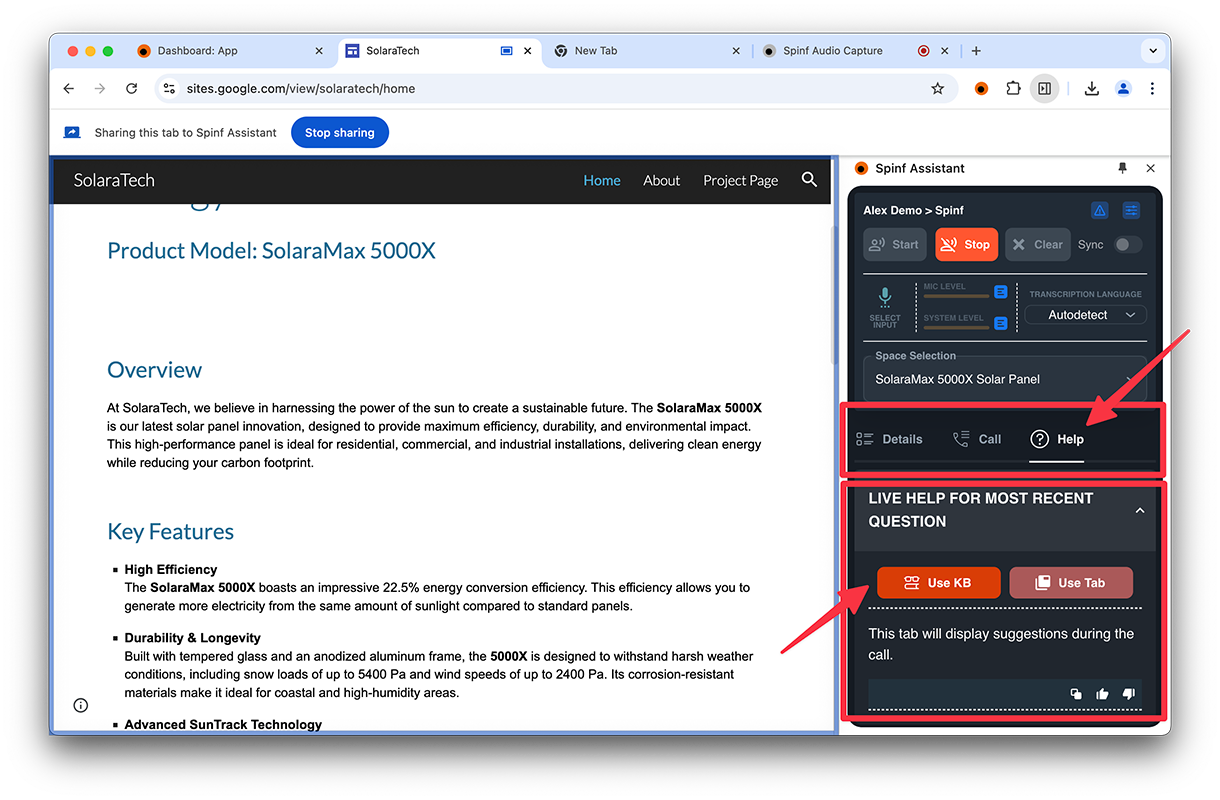
Use Help tab to access the real-time assistant widgets
7. Ending the Session
When your conversation ends, click the "Stop" button in the Side Panel to close the session.
This action will trigger post-session widgets. By default, Spinf will generate a summary of the call.
Next Steps
Congratulations! You've completed your first test call with Spinf AI Assistant. As you become more familiar with the tool, you'll discover how it can significantly enhance your customer interactions, provide real-time assistance, and offer valuable insights from your conversations.
Continue exploring Spinf's features, and don't hesitate to reach out to our support team if you have any questions or need further assistance.
